
Network Scanner
I believe the more you get into IT, the more paranoid you'll get haha.. To a healthy degree ;).
Obtaining a report about your network infrastructure that is automatically generated for you to review easily is to me one of the most useful projects any IT professional and experts would want implemented.
To begin
I won't get into the fundamentals here for Nmap and Docker. This guide is made with the assumption that you have a docker container already running with a volume attached or a functional web server VM. Click on this for Docker's official guide on volumes.
All we will be using are:
- Nmap
- CRON
- Docker and volumes (could replace with a VM instead)
What we will need to know first before we begin is your networks subnet. If you are at home, you are most likely on 192.168.0.0/24 or 192.168.1.0/24 as these are the default subnets behind a router at anyone's home. Using a Linux based computer that is connected to the same network, we could use a powerful tool called Nmap to scan the whole network which will give us information on each and every machine currently connected either via ethernet or wifi. From there, we will need to convert the .xml file to a browser readable .html file. Below is an excerpt of the .html file returning information about my Raspberry Pi. (I didn't include the MAC address)

These are the three lines in my cronjob that is automating this task for me. I have set it up using crontab -e.
0 0 15 * * sudo nmap -A -O -oX /networkscan/scannednetwork.xml 192.168.0.0/24

15 1 15 * * sudo xsltproc /networkscan/scannednetwork.xml -o /networkscan/index.html && sudo mv /networkscan/index.html /home/lapc/.app/app

30 1 15 * * sudo mv /networkscan/scannednetwork.xml "/networkscan/backup/scannednetwork-$(date +\%Y-\%b-\%d).xml"
The first line is configuring Nmap to scan all systems on network 192.168.0.0/24, create an xml file called scannednetwork.xml and input every information that was retrieved in that file. This will be happening on the 15th of every month at midnight,.
The second line is using a tool which you could find on Nmap's official page here to convert the xml report to a functional index.html with its style sheets properly set then have it moved to my docker apache container volume in the above directory. This allows me to pull the webpage from that container to immediately see a real time report about my network. This is happening over an hour and 15 minutes after the network scan. I put enough time in the middle of both events to give the network scan enough time to scan and successfully generate the report.
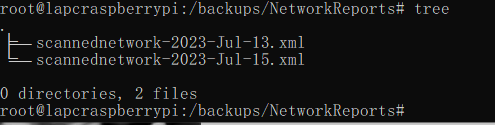
The third and last line happens 30 minutes after the the last line(though I have switched this action to take place 3 minutes after as the previous task takes just a couple of seconds to a minute). What's happening here is that we're renaming the xml file which was created in the first step. adding the current date (year,month,day date) to the file then moving it to a backup folder. This gives me the opportunity to review older reports to compare and contrast changes within my network. If I am compromised, I will be able to tell. Do note, I do not suggest to add your backups within the same directory like I did above, the excerpt was for me to test the commands and share with you what's going on.
seks siteleri tthighereduhryyy.h02g39ND96Q
7b8DrnlSrxx
bozbq3UB7iY
I’m extremely inspired along with your writing abilities
as smartly as with the format in your blog.
Is this a paid topic or did you modify it your self? Either way keep up the
nice high quality writing, it is rare to peer a nice
blog like this one these days. TikTok ManyChat!